
Introduction:
Burp suite is an intercepting proxy that can intercept requests from client side & responses from the server side. The ability to intercept allows hackers to manipulate requests/responses to look for & exploit vulnerabilities. It is mainly used by experienced security engineers & pen testers as it presents a single interface with various integrated toolsets.
Burp Suite has multiple capabilities. The professional & Enterprise version of the tool have scanner feature that scans a target web application / API to discover vulnerabilities. This is possible only if we are able to intercept the requests first.
Burp Suite Professional also as an extender tab where in we can add a set of extensions that can look for additional security violations or work slightly in a different way to discover some default vulnerability checks applied by the scanner
Getting Burp Suite :
Burp Suite is available in following types
Burp Suite Community
Burp Suite Professional
Burp Suite Enterprise
The community version is available for everyone & free to use. It can be downloaded from the portswigger official website. The Professional & Enterprise versions are available as a commercial use. If you are someone that didn’t try this tool & if your organization hasn’t requested for a trial license before then you can use this chance to request for trial version valid for 30 days with full features(note: this option is available while publishing this content, may change in future). Assume we are going to request for trial license for valid reasons to make best use of it.
Installing Burp Suite:
Burp Suite can be run on any operating system (OS) if the OS supports the specific java version installed as it is a java application & available in a JAR format to launch & use the tool.
We are using Burp Suite Pro v2020.2.1 & it requires minimum Java version 8 to install / run the tool.
Configuring Burp Suite:
Before we can use Burp suite, we need to configure it with our client so we can intercept requests/responses. Follow the sections 1,2,3 below to configure
Section 1, Configure browser with Burp Suite
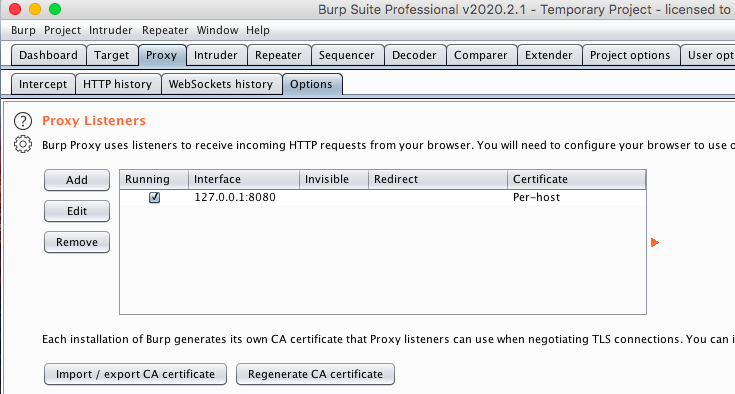
open Burp —> proxy —> Options—> Add Proxy Listener
By Default burp suite runs on 8080 port. so the default proxy listener is localhost:8080. We need to set this proxy listener in our browser to intercept requests/responses.
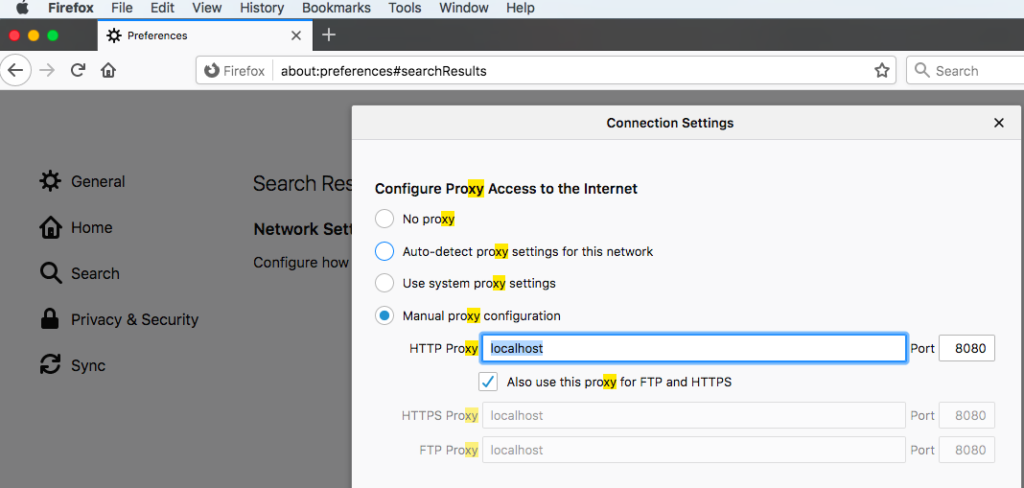
open Firefox —> Preferences —> Network settings —> set Manual proxy configuration to localhost:8080
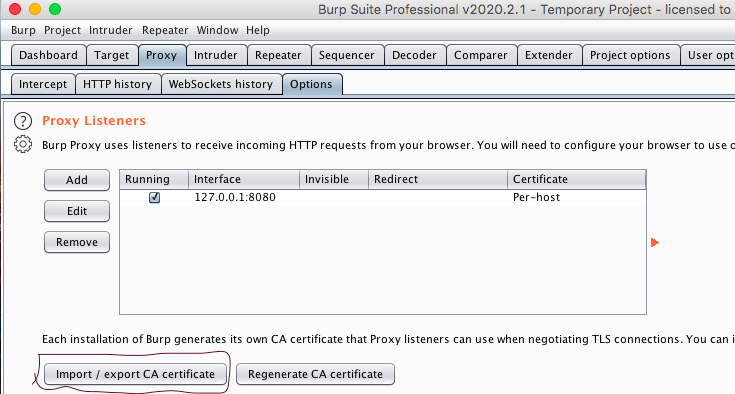
Section 2, Install Burp root CA certificate
This is required to intercept encrypted traffic.
open Burp —> proxy —> Options—> click import/export CA certificate to export the certificate
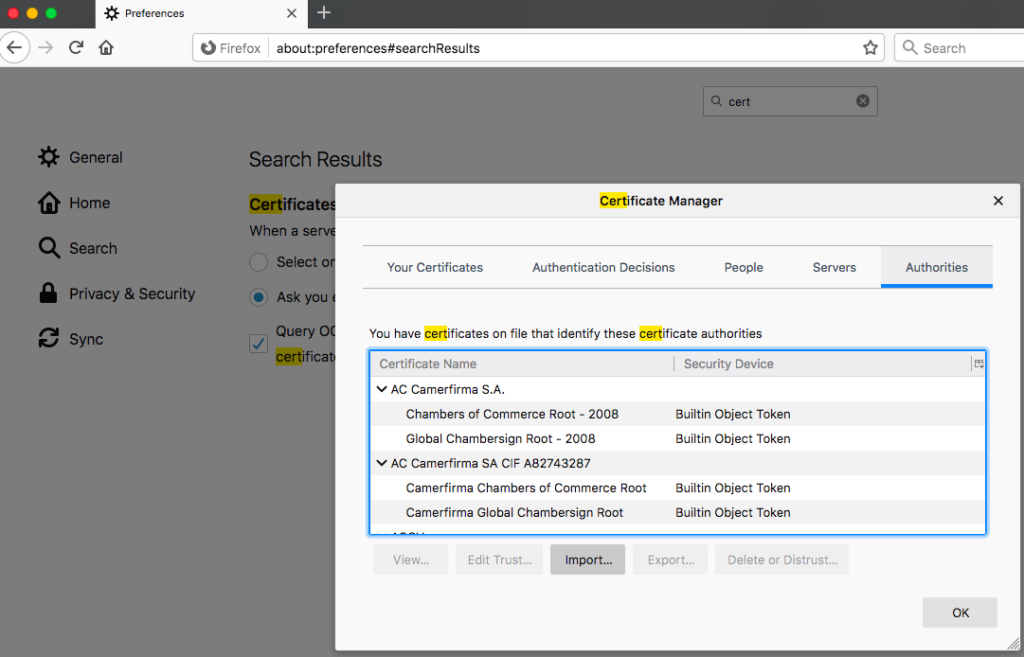
After the certificate is exported, now open Firefox —> Preferences —> certificates —> Import certificate
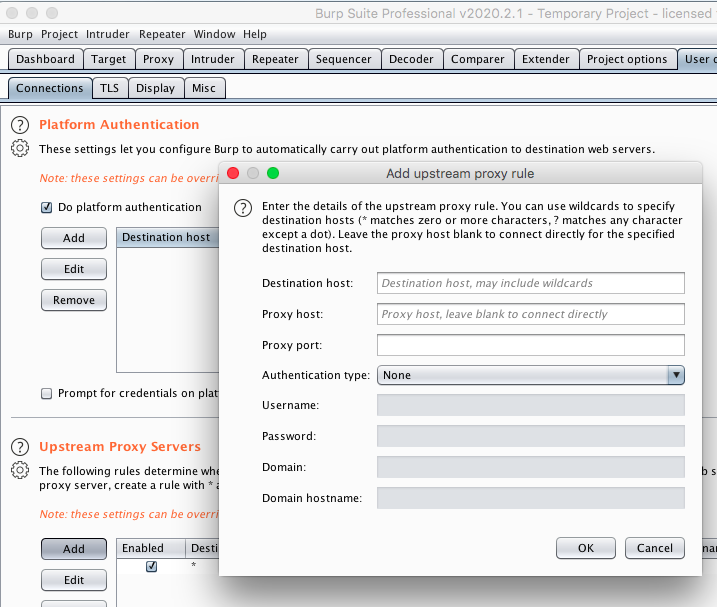
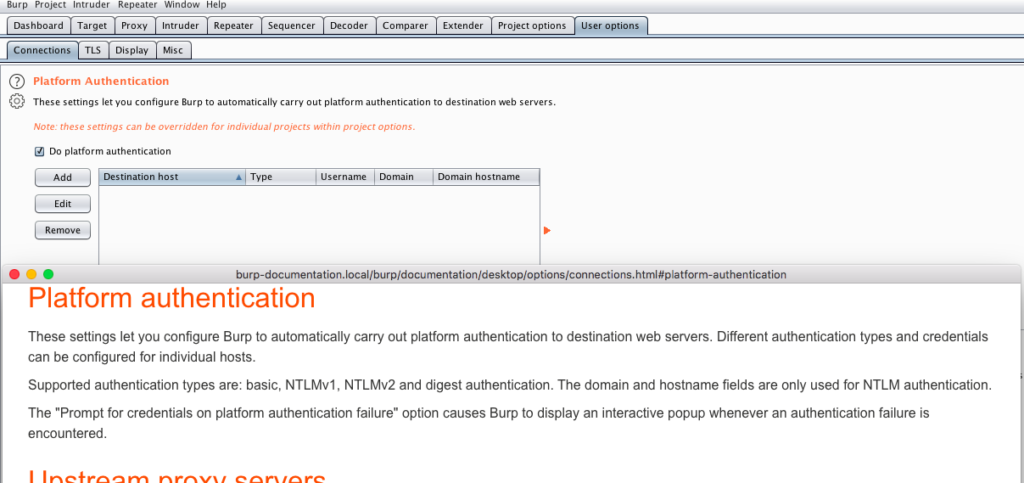
Section 3, set Upstream proxy server
In some corporate networks, there is a proxy configured to connect to internet. To access external sites hosted outside the corporate network or to connect to internet we are required to set the upstream proxy.
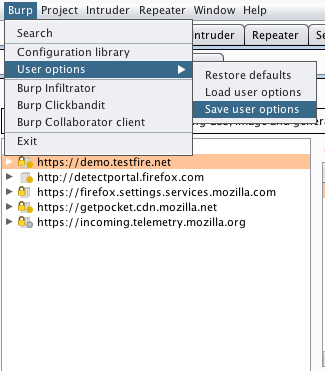
to set this, open Burp —> User Options —> Add Upstream Proxy Servers
Burp Suite Integrated toolsets:
Repeater : It is used to replay the base request with altered/manipulated request parameters & observe the response from server. This feature helps to confirm the existence of a vulnerability as we can replay & observe responses. It becomes a bit easier to check for access control violations with the use of repeater as we will need to alter specific id’s or resources of a user with another user
Intruder : It is used to target specific request parameters with a list of custom payloads & observe the responses for each of the payloads/manipulated requests.
Sequencer : It is used to check for the strength of the tokens such as session cookies , forgot password tokens or user invited tokens etc.,
Decoder : It is used to decode/encode data in to specific formats such as base64, url encode/decode, hex format etc.,
Comparer : It is used to compare two requests or responses to check for any variations.
Burp HotKeys:
we can use key board short cuts to traverse between various sections/tabs of the tools. It can configured from user options —> Misc —> Hot keys
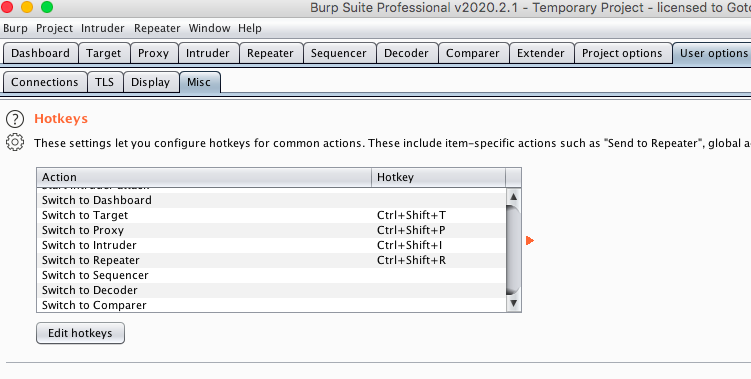
on MacOs, some hot key examples are
command+shift+R —> Repeater tab
command+shift+T —> Target tab
command+shift+I —> Intruder tab
Spidering / Crawling :
Crawl is an interesting feature as the tool automatically crawls a target website to discover all traversable links, parameters, resources etc.,It is recommended to set the scope of the spider to ensure only target site is crawled & consider setting specific crawl parameters to ensure the scanner isn’t overloaded with unrealistic crawl settings
for example : Unique location discovered : should be a realistic/appropriate value
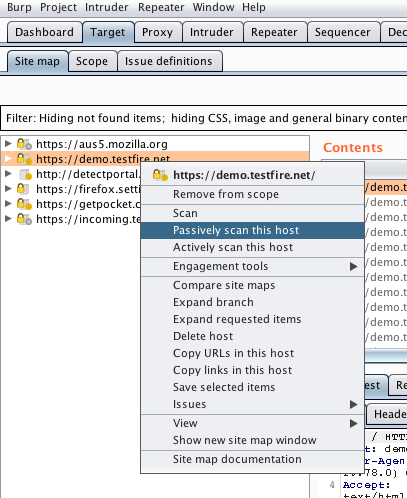
Passive scanning:
During this phase the scanner doesn’t actual send any malicious requests on its own to the server, it simply observes all intercepted requests / responses & reports if there are any missing security header settings , secure cookie settings , sensitive tokens in GET request , other passive checks etc.,
some of the passive checks are applied as soon as the requests/responses are intercepted. To do a passive scan to cover all passive rules, we need to add the target site to scope & right click the target site to choose, passively scan this host
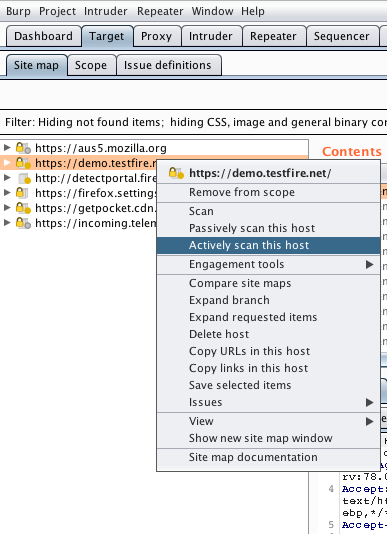
Active Scanning:
During this phase the scanner sends malicious requests on its own to the server from the initial or baseline intercepted requests , observes the responses from the server for each of this malicious requests to identify & report vulnerabilities such as SQL Injection, XSS , etc.,
To do an active scan, we need to add the target site to scope & right click the target site to choose, Actively scan this host
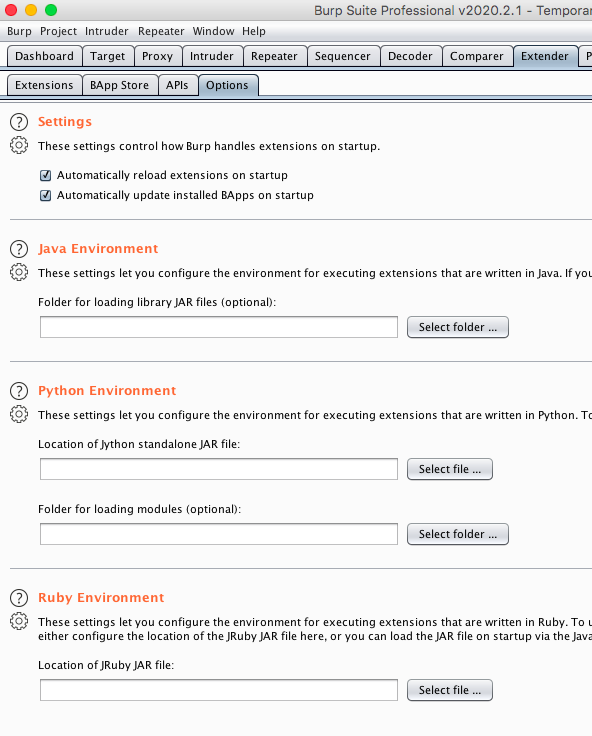
Adding Extensions:
Burp suite has an menu option, Extender. Most of the extensions are either developed in python, java or Ruby. For this reason, we need to set the environment settings under Options section of Extender Tab. Generally to set the java environment settings, we need to point to the location of the java JRE bin installed path, like wise for python, we need to set the location of Jythonstandalone.jar file present in our machine.
After the environment settings are completed, we can add extensions in two different ways. The easiest way to add an extension is go to BApp Store under the Extender tab & choose a extension from the list that you may want to add & use as per your need. Just click install from the right pane to install the extension. To successfully install a extension, the relevant environment setting is a must. Some extensions are available for community version but some are available for only professional version of the tool.
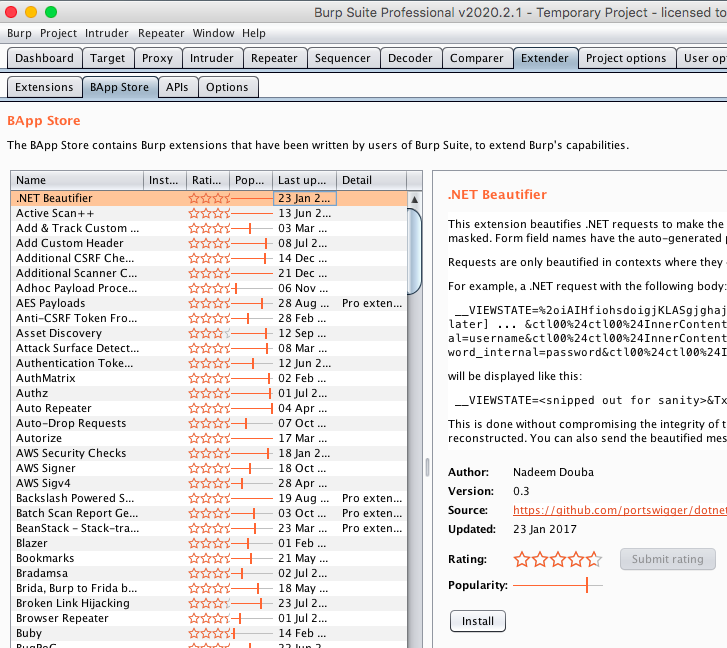
Burp Suite BAppStore has a limited set of extensions, there are lot more extensions available from other resources, such as github, we recommend that you use only extensions that are required & to avoid overloads. Some extensions will fall part of the default scanner to look for vulnerabilities but some will need to be used in a manual way.
Disable Extensions :
There are couple of ways to disable extensions, to disable all extensions, we can tick the checkbox “Disable extensions” while launching burp.
To disable a specific extension, go to Extender tab —> Extensions —> uncheck a specific extension that you do not wish to use.
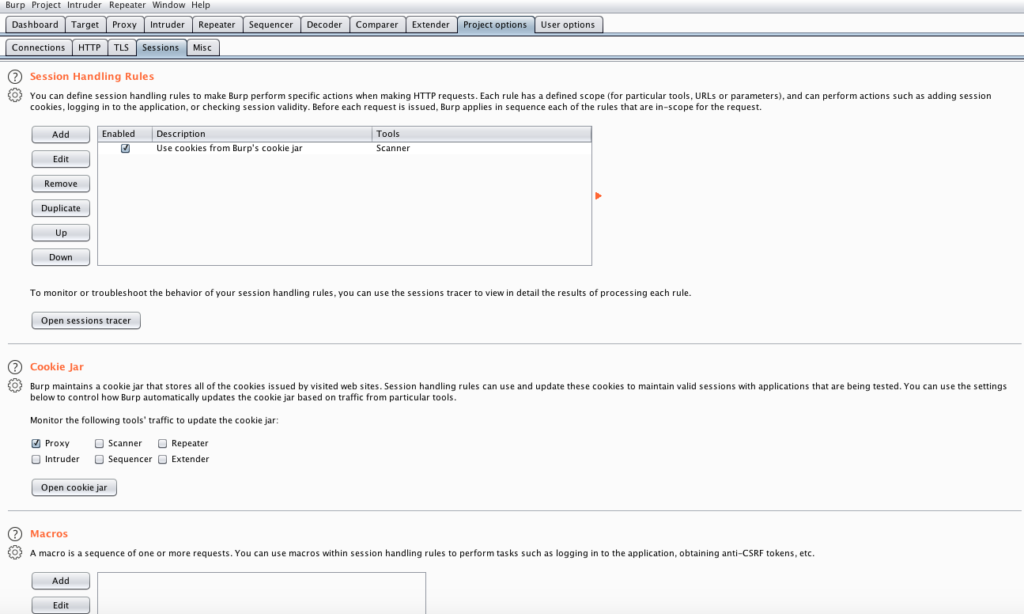
Project Options:
Configurations & settings apply to the current project hacking session
(Macros, session Handling rules, cookie jar etc.,)
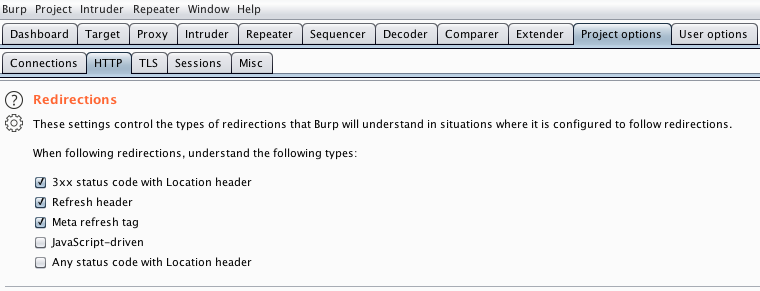
when following redirections, understand the predefined types, JavaScript-Driven is not enabled by default.
Project options —> HTTP —> Redirections
some useful project options
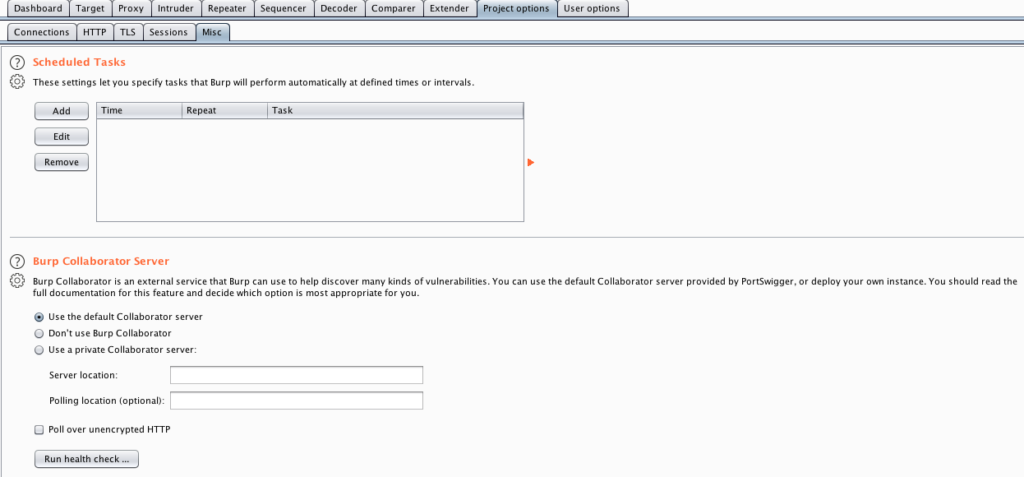
Project Options—> Misc —> Scheduled Tasks, Burp Collaborator Server
Project Options —> sessions —> Session Handling Rules / Cookie Jar / Macros
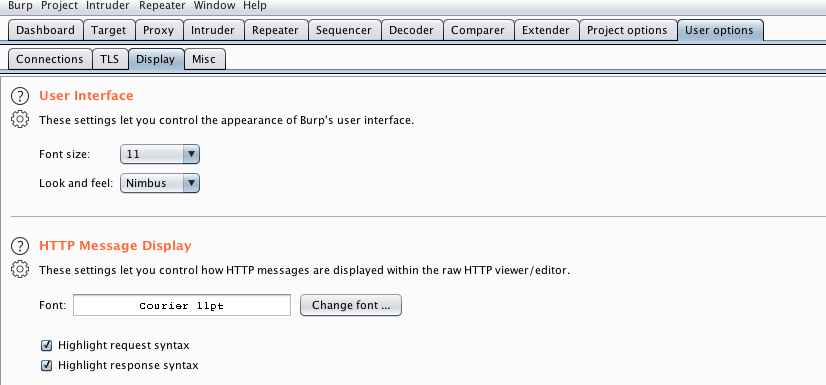
User Options:
Configurations & settings that apply to Burp suite
(proxy listener,upstream proxy, hotkeys etc.,)
some useful user options:
User Options —> Display —-> User Interface / HTTP Message Display
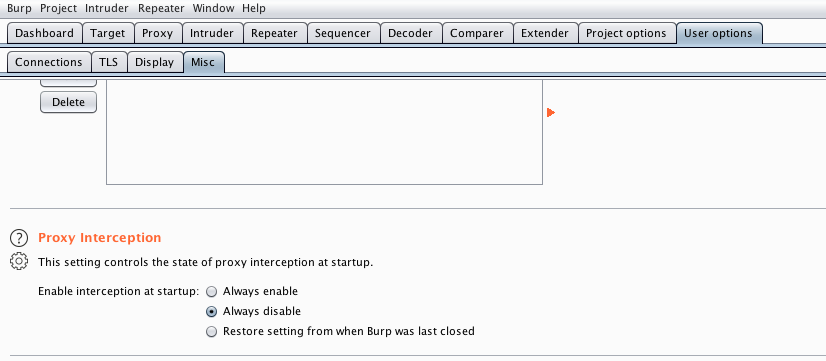
User Options —> Misc —> Proxy Interception
Platform Authentication
Saving Options for Future Use
Engagement Tools —> Search / Find Comments / Find Scripts / Find References / Analyse Target / Simulate Manual Testing
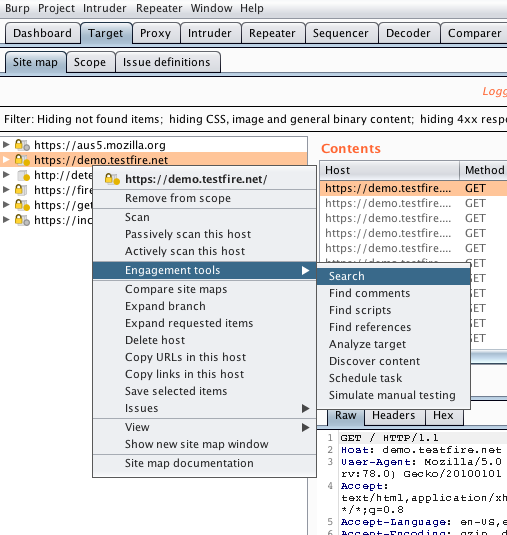
Search : Used to search for specific strings or to search & look for sensitive information disclosure such as API keys, credentials etc.,
Find Comments : When used shows all comments left over by developers in target site resources
Find References: When used shows the reference of the target site in various places of the intercepted requests / responses
Analyze Target: when used displays, number of dynamic urls, static urls,parameters, unique parameter names
Simulate Manual Testing: Let’s you take a break while the tool automatically sends requests to the target site to avoid session timeouts.