
This article outlines the steps required to set up OWASP ZAP & run web application scans to discover security violations if any present in the application. This article & all content published on this site is for learning / education purposes only
what is DAST ?
Dynamic Application Security Testing (DAST) is a technique used to discover security vulnerabilities in web applications / services during runtime. This phase do not require access to source code. A DAST can be run on a full application or specific application journeys depending on the change / release cycle.
why do we need DAST ?
Well, when we are developing or delivering a application we usually test it to verify if the intended functionality is working. Similarly, to verify if an application is secure, depending on its scope we can apply some security controls. One of the security controls / techniques is DAST.
When do we do DAST ?
It depends but usually whenever there is a new change in the application. You can scan as often & as early as possible to discover the security violations early. All it needs is a stable environment access to run scan on deployed application. By doing early scans, possibly teams can reduce efforts / cost involved for identifying & fixing security flaws.
what is OWASP ZAP ?
OWASP ZAP aka ( Open Web Application Security Project Zed Attack Proxy ) is an intercepting proxy. When configured with client side such as a browser, it can intercept client requests & also intercept responses from the server. It has various useful features & capabilities to run Passive & Active scans.
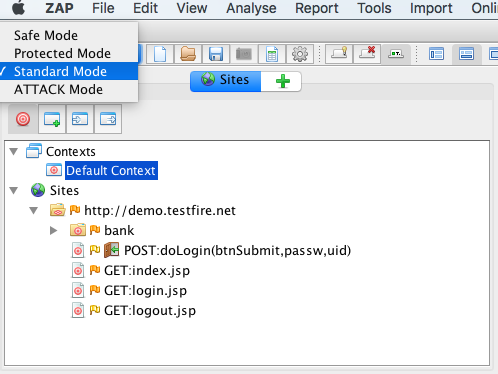
ZAP has different modes such as safe mode, protected mode which are restricted , meaning we cannot use full ZAP features under these modes.
standard mode is used for accessing full features of the tool & Attack mode is used to scan live inscope applications as soon as (or) as and when they are intercepted
What is Passive Scan ?
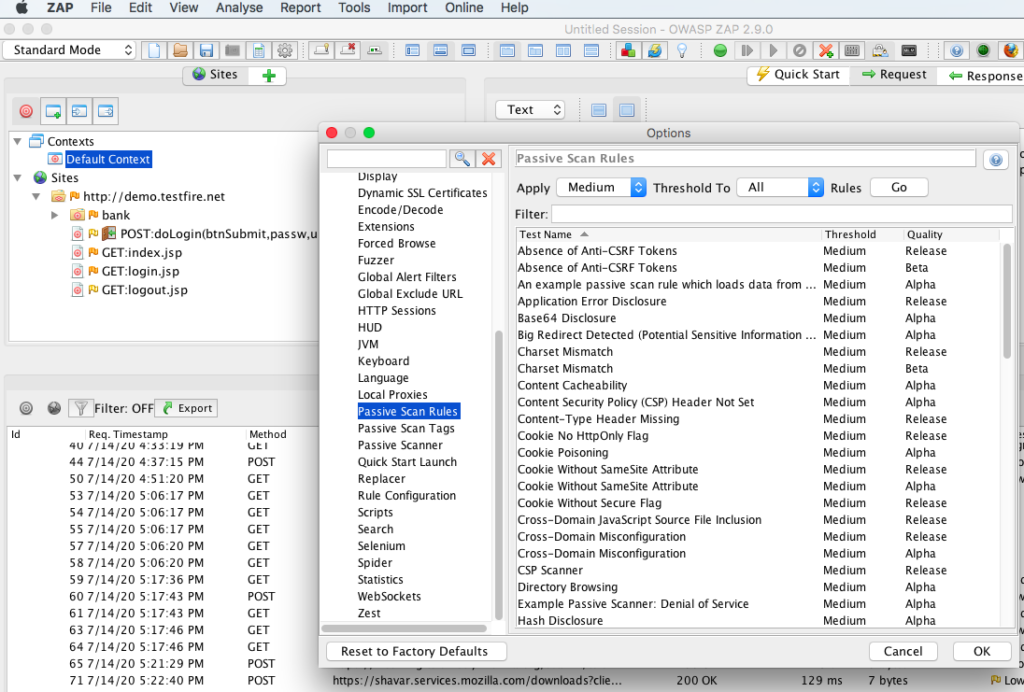
It is a phase where the intended applications under assessment are being intercepted by the tool & those requests / responses are observed by the tool to flag security misconfigurations such as missing security headers or cookie settings. The tool doesn’t send any new requests on its own in this phase, it just analyses the intercepted requests / responses.
ZAP passive rules can be seen under Tools –> Options –> Passive scan rules
what is Active Scan ?
It is a phase where the intended applications under assessment are attacked by the tool by sending new requests with malicious payloads to discover security violations.The tool flags the violations based on its behaviour / received responses from the server after injecting malicious payloads. These payloads are introduced by the tool after we complete intercepting the application journeys that we want to test so they act as a baseline for the tool to start sending new requests with new payloads.
ZAP active scan rules can be seen under Analyse –> Scan Policy Manager –> Default policy –> Click Modify –> view sections (client browser, injection etc.,)

Pre-requisites to implement DAST using OWASP ZAP ?
To install ZAP, you need to have admin / root access & atleast java version 8 installed as the set up requires java 8+ to run.
ZAP is cross platform & runs on any OS that supports java version 8
once the installation is complete, follow the below sections A,B,C to set the initial configuration settings to intercept client requests & server responses.
Section A, Configure ZAP with Client Side Browser
Before we can begin to use ZAP features, it needs to be configured with client browser.
By defaults ZAP local proxy listener is set to localhost:8080 .
This can be seen under Tools—>Options—>Local Proxies
To set up same local proxy listener in Firefox, go to Tools—>Options—>Advanced—>Network—>Settings—>set Manual proxy Configuration to localhost:8080 & tick the checkbox to use this proxy server for all protocols.
Section B, Import ZAP CA certificate into Browser
This step is required to intercept HTTPS requests / traffic
To export ZAP CA certificate, go to Tools —>Options—>Dynamic SSL Certificates & click save to export the certificate. You can click regenerate the certificate if required & save it.
to install ZAP certificate into Firefox browser, go to Tools—>Options—>Advanced—>certificates tab—>View certificates—>under Authorities—> Import & tick the box to Trust this CA to identify web sites
Section C, Set an Outgoing Proxy Server
This is only required in networks where you use upstream proxy to connect to external networks or internet.
To configure outgoing proxy in ZAP, go to Tools—>Options—>Connection—>use proxy chain—>enable use an outgoing proxy server—>provide proxy IP address and Port —> also provide credentials if the proxy requires authentication.
To verify successful set up, try to access a demo / test site to check if you are able to intercept application requests / responses
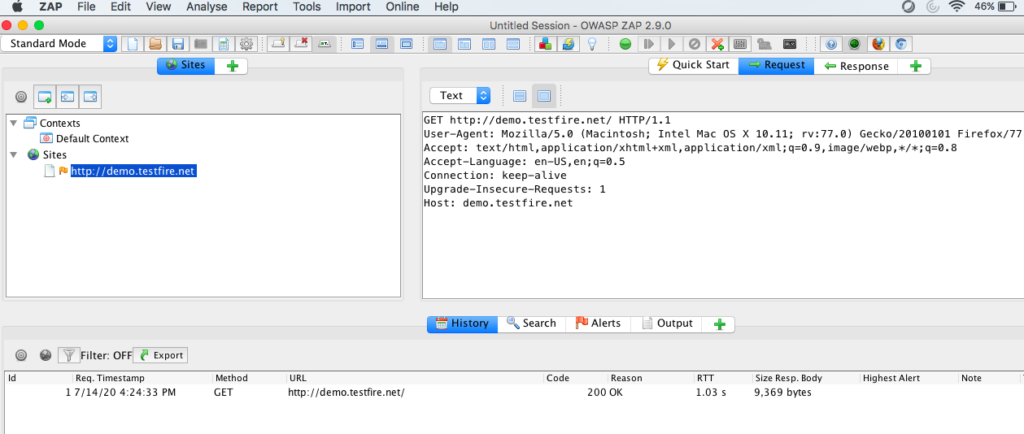
If you are unable to intercept requests / responses then recheck the sections A,B or C above to include any missing configuration settings
OWASP ZAP – Points to note
- Default ZAP Scanner do not have coverage for access control related checks such as Privilege escalation / Insecure Direct Object reference / Business Logic Testing etc., those need to be covered in a manual security test phase by an experienced security engineer.
- ZAP do not have much coverage or scan rule checks for API’s / Services & supports only a few API type scans.
- When running a scan on applications, we must always use the context to set inclusions/exclusions for the scope of scanning & avoid scanning unauthorized domains.
- You can access ZAP API’s client side using http://localhost:8080/ , helpful for scripting the api end points for ZAP automation integration.
- For automation set up, revisit sections A,B & C above to check if you need to enable any settings to avoid user intervention. e.g: outgoing proxy set up.
OWASP ZAP Steps to Implement Form Based Authenticated Applications Scan :
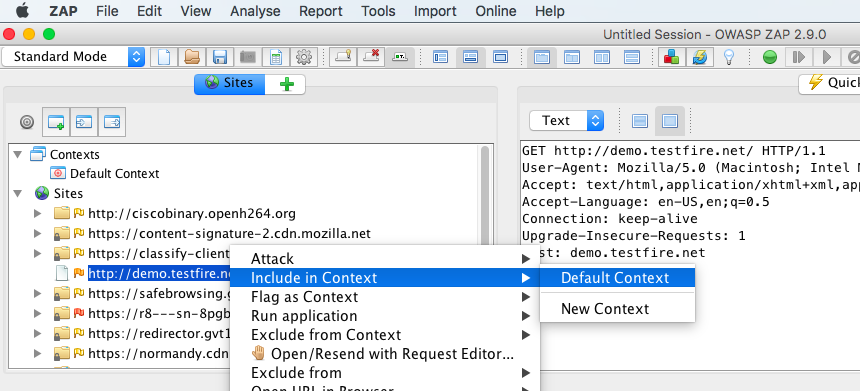
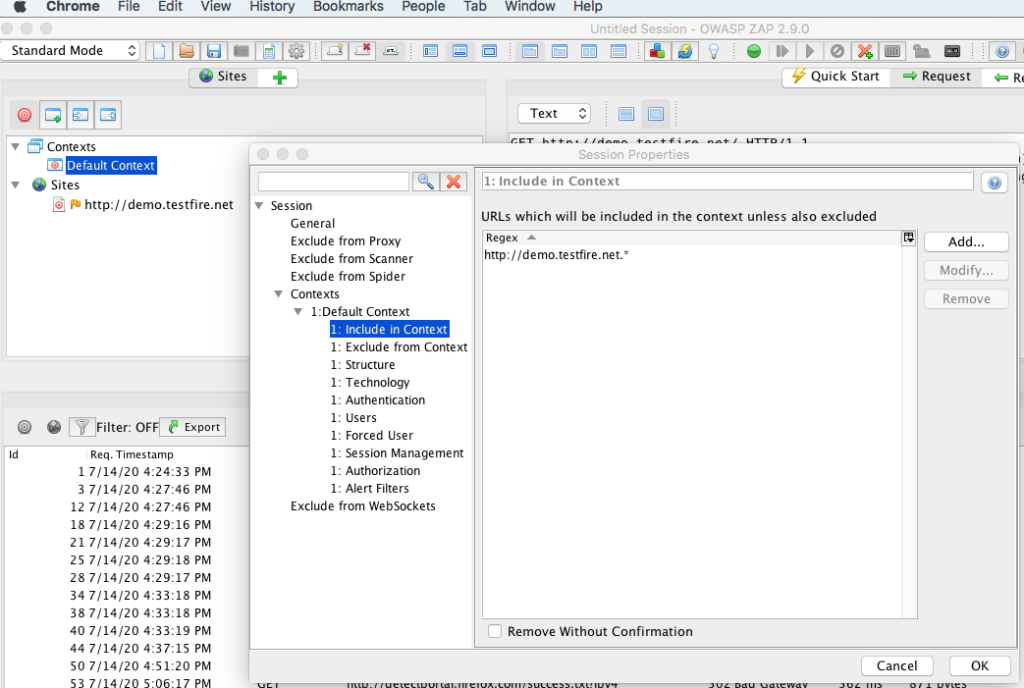
After you are successfully able to intercept the application requests/responses. In ZAP UI under sites, right click the test domain you want to scan & choose to Include in context –> Default context. Here context is nothing but the section that allows us to set the scan scope & various other configuration settings.
Now lets explore each of the sub sections under Default context
Include in Context is used to include test domains which we are going to scan, domains included in context are the one’s considered has in scope for scanning
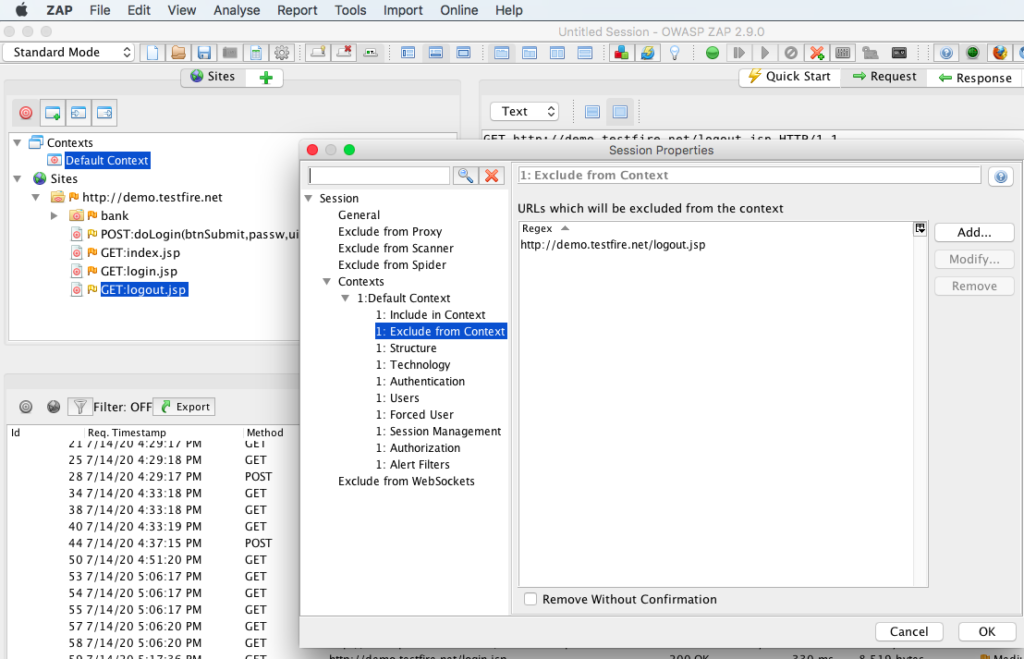
Exclude from context is used to exclude any end points from the in scope application scan phase. Generally, its recommended to exclude logout page to avoid session termination for a full authenticated application scan. Likewise, if there is a account lockout policy you can exclude login page to avoid lockout of test accounts. You can also exclude email triggering or sms triggering end points if there is no rate limit to avoid spamming / sending bulk emails or smses. Consider other exclusions based on your requirements also.
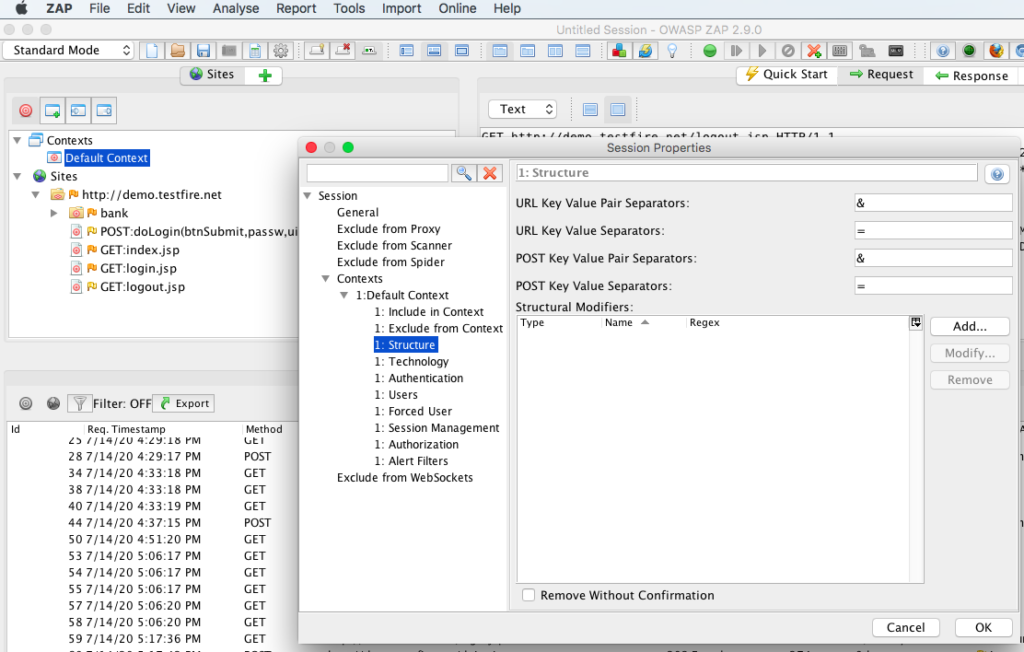
Structure section is good to keep as default unless you have a different requirement for the settings in there.
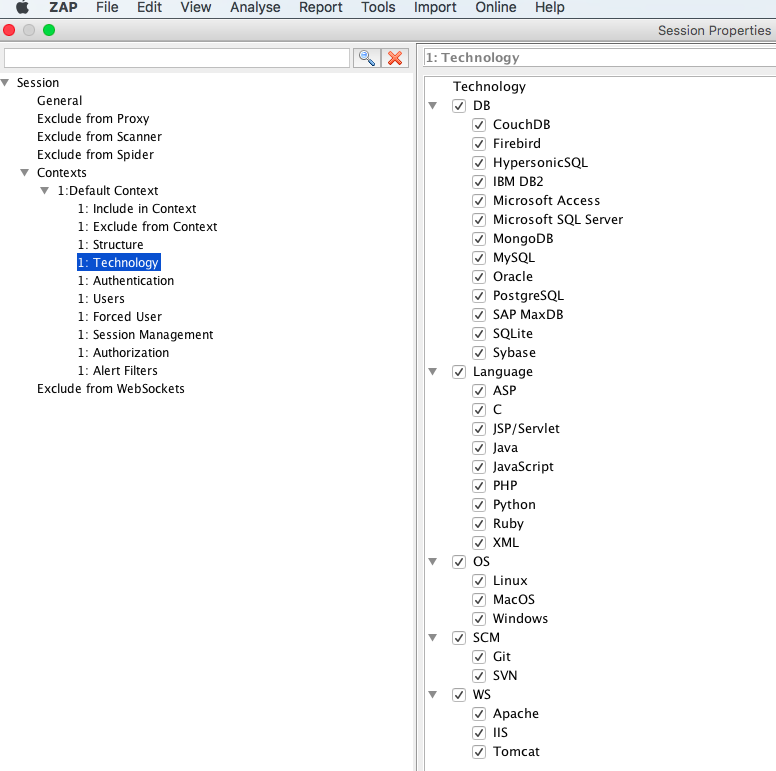
Technology section, here we can choose relevant technologies involved for the test site such as backend Database, web server where the application is deployed , programming languages used for development , source code management systems for code commits / maintenance & operating system / server. If you are unsure then its best to leave it default with all settings enabled.
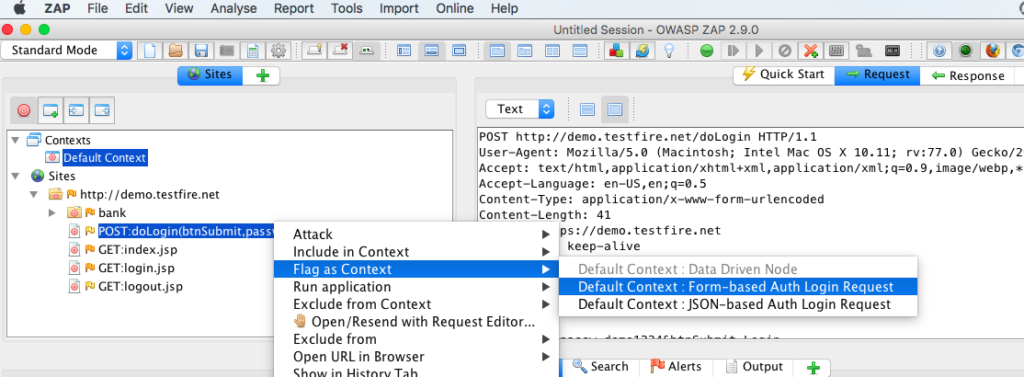
Authentication is used to set the authentication settings required for the application. In this case, the test site is a form based authenticated application, so in ZAP UI, under sites, choose the end point that is used for login, right click that & Flag as context–>Form Based Auth Login Request.
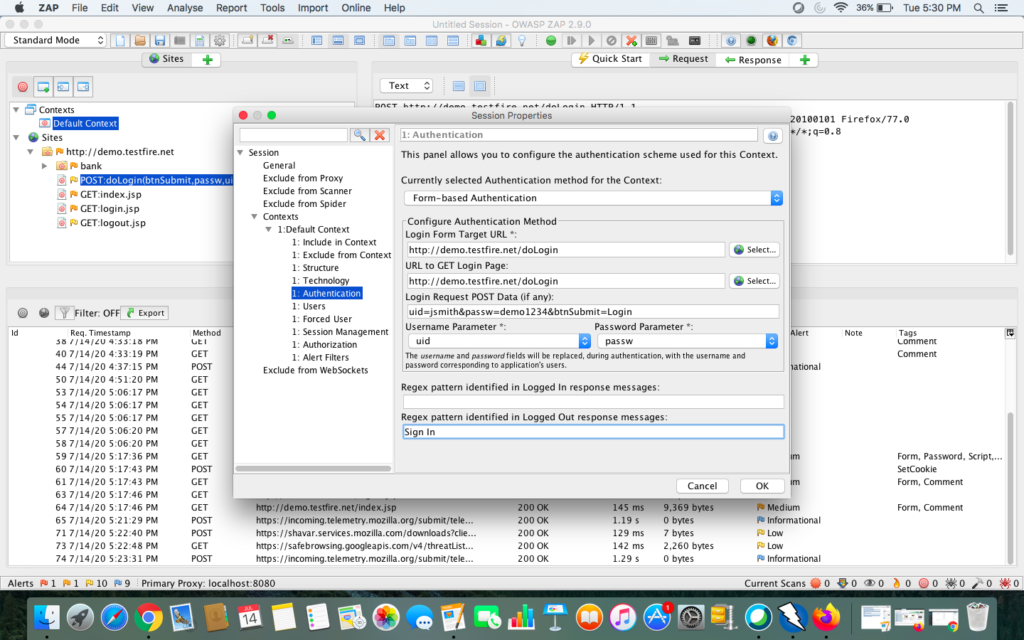
Next we will see a dialog window to set the required settings for authentication. Verify if the login url, username, password parameters & login or logout regex are set correctly. The regex you set should be included in every expected response, like in this case it is Sign In for all unauthenticated / logout responses.
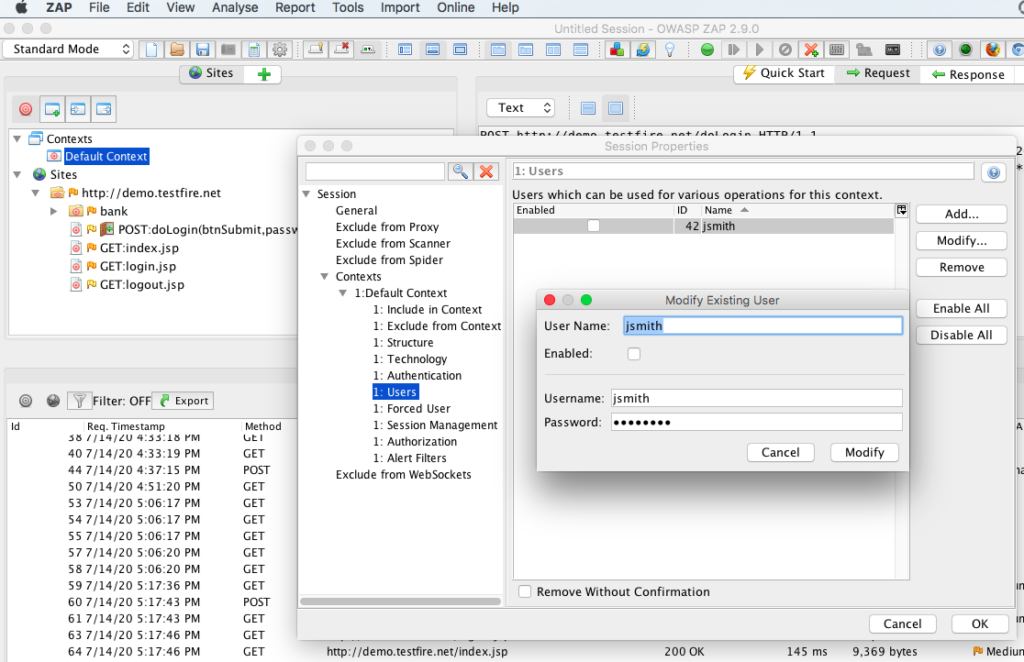
Users in this section we can add the user credentials or the account that we are going to use for scanning the test site. We can probably do the scan using admin account to achieve maximum coverage. Tick the box in this section to enable the user.
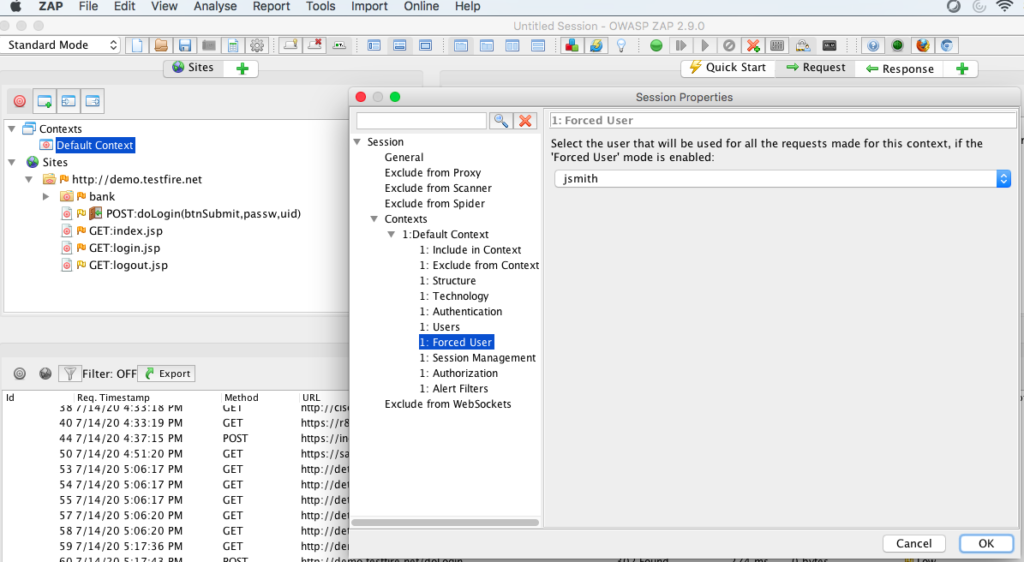
Forced User in this section we can choose a added user account to run the scan in the context of the user. Also, in ZAP UI we need to enable the lock with person icon on the top menu bar to enable forced user mode setting
Session Management section, in this case it is a cookie based session management application.

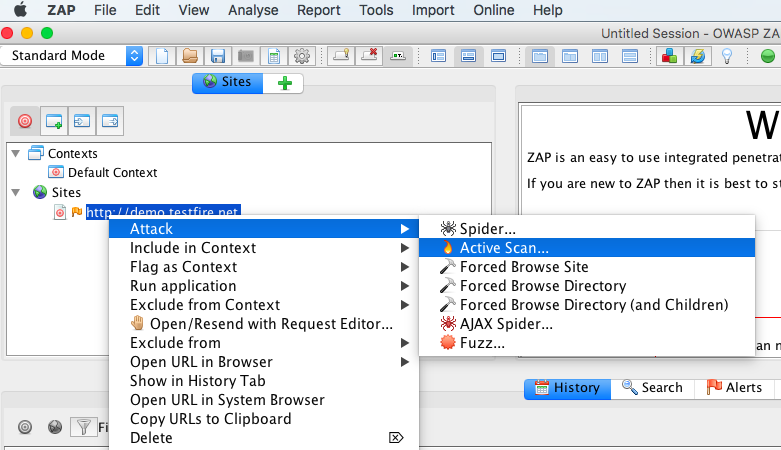
These are all required settings, sufficient to do a form based authenticated scan on a demo or test application. Once all the required settings have been updated, from ZAP UI under sites right click the target test domain & choose Attack –>Active Scan to run active scan on intercepted journeys
There is also an option to do Attack–>Spider before running the active scan but that option is recommended to be used only when required to do a full application scan or comprehensive scan. In Spider phase the tool will crawl through the application to discover all paths or end points accessible in the application including .js, .css, .html, .jpg, .png, .gif, .php , .jsp & so on
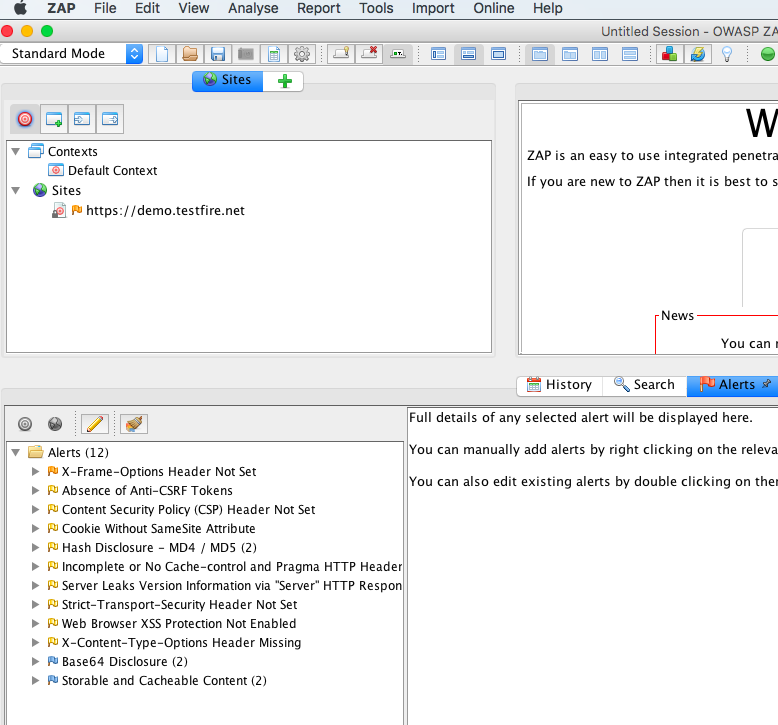
Reporting: All discovered security violations can be seen under the Alerts tab. To generate a html report, go to menu bar option Report –> Generate HTML Report. Likewise you can also generate reports in other available formats – XML , JSON etc.,
We also have other useful features & ZAP docker container which we will add in later. Hope that we have helped you and that you have enjoyed this lesson